Monday, December 1, 2014

Zombie App Mashup Volume 3: Doceri/Google Screencasting + Coordinate Graph Art Section 2: Graphing Pets! is now available


http://www.teacherspayteachers.com/Product/Elementary-Coordinate-Graph-Art-Section-2-Graphing-Pets-1590910
Happy Holidays everyone! 

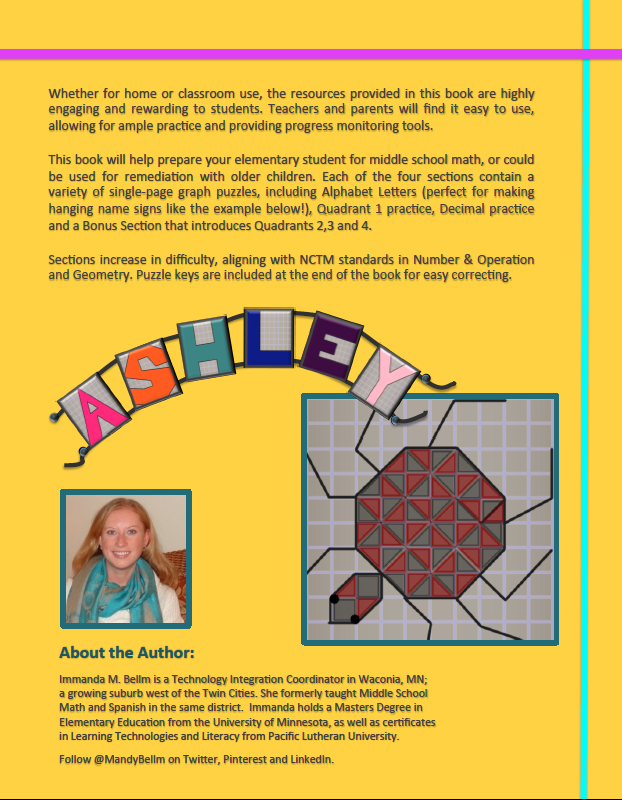
It's December 1st and we've already got the tree up, the lights hung, decorations are on display, and somehow I've finished Section 2 of Coordinate Graph Art: Elementary Edition! It continues to cover the basics of coordinate plane graphing, using a fun pet theme. Eight cool new graphs are included, like this simple but funky kitten :)

I am also starting a new adventure in the new year (in addition to my current job, which I still LOVE!), working part time in the evenings and summers for Learners Edge, Inc. evaluating and coordinating two online and one on-site course over the next six months.  This puts some added pressure to finish up this current Elementary book, but that's what Zombies do best... stay up all night, eat some chocolate Santas, and get 'r dun. 

While I work on that, I've got a new App Mashup for you to chew on:

Doceri Desktop iPad App + Whatever you're doing on your computer + Google Drive

https://itunes.apple.com/us/app/doceri-interactive-whiteboard/id412443803?mt=8 I find it quite funny that one of our oldest and most reliable apps has taken a complete back seat to more "exciting" presentation apps, like Educreations, ShowMe and Prezi, just to name a few. Not that there is anything wrong with those; I still like them very much! But when you're in a pinch, and you need to make a quick demo video of something you're doing on your computer, Doceri Desktop gives you a nice hands-free way to do it, complete with an ink layer!

Many teachers have discovered that you can download the free computer version of Doceri from their website, as well as the iPad app, and use the program over Airplay to remote-control your Powerpoints, Smart lessons, PDF's, websites, whatever it is you are displaying. BUT the vast majority of those teachers have forgotten that there is a record button sitting up there in the top/left corner. You can see it from here, can't you?!? 

If you're going to be out sick the next day, simply pop up your lesson, in whatever format you've got, turn on Doceri, hit record, and start talking/surfing. There's even a "pause" button if you need to stop and cough. Or worse. SERIOUSLY people, there are some nasty, nasty bugs going around right now. Take it easy! Take a day off... do some Christmas shopping, at the very least. 

Anyhoo, when you feel like continuing, hit the record button again and keep going with your lesson. Don't forget about the ink layer button! This tool makes Doceri sooooo much better than Splashtop, not to mention the never-ending free trial ;)  You can hit the start/stop button on the pen as well, while you're still recording, and move back to remote controlling your computer. I usually try to keep my recording to under 5 minutes, so as not to "lose" the audience. 2-3 minutes is probably more realistic. You can always do multiple recordings as well. 

When you're done, go to the folder icon in the top-left corner. Select the presentation you just made, and save it to your camera roll. 

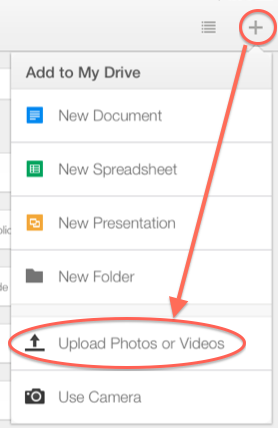
From there, open your Google Drive app and use the upload button to grab the video from your iPad. I shared directions and screen shots for how to do this on my last blog post. You can then share your video anywhere! Your LMS, an email, a "Remind" message, a Tweet, on Google Classroom, you name it. Instant flipped lesson. Or email it to your sub to use while you STAY HOME AND REST!!

**Just don't forget to adjust the "sharing" settings to say "anyone with the link can view". Otherwise you're going to get a big room full of crickets and a video that won't play. 

This may not be the most exciting app mash-up I've shared, but it's definitely one of the more under-utilized ones. You don't have to be Mozart or Shakespeare to make screencasts. Just start simple! Record while you're teaching. The kids don't even have to know that you're recording. 

You could even try it with my new TpT item, Graphing Pets! Put the instructional page up on the Smartboard and turn on Doceri. Hit record... read through it with the students, turn on the ink layer, and either you as the teacher, or one of the students, can write down the answers and complete the graphs. Then try out the process I've shared, and post it as a flip-lesson, with choices of the other 7 graph pets for homework! 

Simple, easy, fun... with the lesson objective and student engagement at the heart of the activity :)  

Now it's waaaaaay past Zombie's bed time... Nighty night!


Sunday, November 16, 2014

App Mashup Volume 2: Pic Collage + iMovie + Google Drive and Coordinate Graph Art: Elementary Edition Update!

http://www.teacherspayteachers.com/Product/Elementary-Graph-Art-Section-1-Graphing-ABCs-1562019
From "Happy Spring" to "Happy Fall", all in one blog post. OUCH. 

I'd say I'm sorry, but... I'm not. 

Honestly life is moving at such a break-neck pace right now that it's a gift just to take a deep breath a few times a day, get some exercise a few times a week, and if I'm REALLY lucky, sneak in a nap here and there.

When I think of how far I've come (and the rest of the world as well) since my first blog post in 2011, I'd say the old Zombie would hardly recognize the new Zombie. I'm guessing you readers feel the same? Can I get an "Amen!"?


For starters, I value my sleep a little more than I used to. Having moved within 2 minutes of all the schools I visit on a daily basis, knowing that I *could* and SHOULD be getting 7-8 hours of sleep, I sometimes actually do sleep 7 hours. So I'm more a figurative Zombie these days than a literal one.

On top of that, I now publish daily help documents, post district technology updates to our LMS, craft style guides, etc. for my job... so coming home and writing additional works... whether they be blogs, workbooks, tweets, or otherwise... is kind of overkill. But, I happened to have a quiet weekend for once, and a clean house (which rarely happens these days!), and I have news to share that is getting me to finally, FINALLY, compose another blog post... drum roll... 

Coordinate Graph Art: Elementary Edition is now in the works! The idea for this book has been stuck in my head for years... ever since I wrote my first edition... but it seemed more appropriate to write Advanced Graph Art first so that those high-flyer students could keep working, than to back-track and start writing for a younger audience. 

I knew I wanted to open with an ABC section of Graph Art, so children could not only practice beginning graphing skills, but could also make a set of their name letters that could be connected into a banner for home or school use. Hence the example on the back cover, which is yet another tribute to my late sister Ashley in the coolest way I could think of :)  LOVE YA SIS!

Enough shameless plugs for my various products... I did have a point to this post... I suppose I should get to it!

Alrighty then - App Mashup Volume 2... I'm currently working with our Elementary Spanish teachers to incorporate our 1:1 fourth grade iPad project into their classes. When you only have 20 minutes per day with each class, it's hardly worth the trouble to get out the iPads, try to train the kids on an app or get to a website, and then have any time left over to learn new content. My solution? Start with an app the kids are already familiar with. Pic Collage. It's free, doesn't require any accounts to be made, and is extremely easy to use. 

Here's an example of a completed Pic Collage. It's like a virtual scrap book page. You choose a background, then overlay stickers, photos from your camera roll, images from the internet, text, and then easily turn/twist/size/layer them to your heart's content.

There is zero limit to a child's creativity... give them a topic and let them go nuts. I'd put this app in the "M = modification" level of SAMR, because there is so much added functionality and student input required in synthesizing together the various pieces of content that they chose in a meaningful way. 

When finished, simply export to your camera roll and email/upload/post it anywhere.

The mashup comes in when you take various Pic Collage images and send or post them to a common location. In this case, I want to use iMovie to compile all the Pic Collages together and then dub an audio track over the entire presentation. Whether you choose to have multiple students work on their own Pic Collage, and then have one master student (or the teacher) compile the images into the iMovie, is totally up to you. 

When you are ready to begin the iMovie portion, you select "Movie" instead of trailer, and then add each of the Pic Collage images into the video in the order you would like them to display. 

The next step is to record the audio to go with each image. If students are involved, you can call them up one by one to speak about their portion (talk loud for the mic!!!). Otherwise, you as the teacher can record your own audio that covers the entire video. 

Last, adjust the length that each image displays, to match the audio clip that pertains to it. Play the whole video back to ensure it is correct, before exporting the final draft to your camera roll. Once you make this step, you will lose any editable features in the compiled video (unless you keep the pieces on your device and in iMovie - which take up a lot of space!). 

To export your video, click back to the main menu for your video. You should see the title, the duration, and the last modified date. 

Click the export box with the arrow pointing upward (circled at left). Then select "Save Video" to export the video to your device's camera roll. From there, you can send anywhere. BUT keep in mind, it's probably a very large file size... so you can't just email it around.

Which brings me to the last step of this App Mashup - sending your project somewhere for an authentic audience. If your school uses an LMS (we use Schoology), you can go into the app and upload the video into a media album, post as an update, or add to your personal/group/course resources. If you don't have an LMS, or want to avoid that step, you can upload your video to Google Drive from the Drive app (either Droid or Apple). 

Launch the app, then hit the + button and select "Upload Photos or Videos". Click on "Photos" and then pick the video(s) and other media you want to upload. Click the blue checkmark. 

Then WAIT. Your device will look like it's "frozen", (Hahaha) but it's NOT. It's just thinking. So Let it Gooooooo... maybe watch this hilarious cover while you're waiting. Best ever. Even if you're as sick of the song as I am ;)

Once it's done uploading, you're ready for the final step.  And the most annoying one... because now you need a computer... so boot up your Google Drive and click the "sharing" button on your video. You need to change it from "Private", to "Anyone with the link can view". 

You cannot do this final step from the app (yet!?!?); all you can do is add individual viewers' emails which is too tedious unless it is a student sharing with only one teacher. At any rate, once you have added the viewing audience, you can copy/paste the link to the file, and then post it or email it to any authentic audience, anywhere on the planet... or in cyberspace.

**Please keep in mind, if any students' personal information or photos are present in any of the parts of the video or Pic Collage, you will need to obtain written permission from the student and/or parents (if a minor) before posting takes place. 

That's it for now! I hesitate to give you project suggestions of how you could incorporate this mashup, because your goal with technology integration should *really* be on what your instructional / curricular objectives and learning targets are. If you have decided on those aspects of your assignment, and this work flow fits into what you or your students are doing, I'd love to hear about it!

Post a reply and let me know what worked/didn't work or whatever questions you have about the whole process. 

And don't forget to stop by my TpT store and check out my new unit! :)


Saturday, April 5, 2014

App Mashup Volume 1: Reflector + Laptop + TV and Graph Art eBook + Notability Workflow

Happy "Spring" to one and all! 

I use that word very lightly as Minneapolis just got hit with Snowmaggedon #3 IN APRIL, leading to a 2-hour late start in many school districts on Friday. While I very much enjoyed the extra sleep (Daylight Savings Time hit me like a ton of bricks this year), I did not enjoy the hour of shoveling to make the driveway bike-friendly. Luckily we are poised to hit upper 50's the next few days, and 71 by Wednesday! Hallelujah!

My apologies, yet again, for not posting more over the winter. I've thought about starting app mash-up posts many times and something always seems to get in the way. But no more! The time has come to start networking again, as I gear up to write "Coordinate Graph Art for Beginners" this spring and summer. I'll be posting progress updates and downloadable sneak peeks for my awesome readers (& Pinterest/Twitter followers) as the weeks march on.

Being a Technology Integration Coordinator, naturally I'm getting peppered by questions of "Why don't you release your existing books in e-reader format?" And the answer has always been, because the puzzle is on one page and the graph paper is on the other. Kids would have to toggle back and forth between the graph paper and the puzzle. It is feasible with the digital copies of my books that I just posted on TpT: Coordinate Graph Art: Teacher Edition, Coordinate Graph Art: Student Edition, and Advanced Coordinate Graph Art: Student Edition. Advanced Coordinate Graph Art: Teacher Edition has been posted for some time now.

Purchasing any of my eBooks gives you permission to copy/paste/print/scan/share its contents in unlimited quantities throughout each teacher's courses. This also includes digital devices (e-Readers, posting to online LMS, iPad, tablets, smartphones). I would, of course, appreciate shout-outs to parents of where you found my book, so I sell more ;)  

My existing books are in "print format" so they read best with multi-page selected so that the graphing directions show on the left, and the graph on the right. Then, either the teacher or the students take a screen shot of the graph, import it into an annotation or note-taking app, complete the puzzle, and then submit their work electronically back to their teacher. Or, just show it to your teacher when done! This will make coloring the final product much more engaging and less messy than using pens, markers, or crayons. 

My recommendation for ease of the above: 

1. Buy the eBook edition you desire (either regular or advanced) in both the teacher and student edition. The teacher edition has the keys, while the student edition has the correct page format to "capture" the instructions next to the correct graph paper. You could get away with just the teacher edition by posting the graph paper and instructions separately, and having the students toggle back and forth on the iPad between the screen shot of the directions, and marking up the graph paper in a note-taking app. 

2. Screen-shot or copy/paste the graph you want to assign into your online assignment posting. We use Schoology (which has a paid and free edition), but you can now attach images/files through Remind101 as well. 


3. Students access the online assignment and download the images to their camera roll.


4. Students import the graph page into their note-taking program (Skitch or PaperPort Notes are both free, but I like Notability the best - which is paid). 


5. Students use the writing function to complete the graph picture, toggling back and forth between their note-taking app and their camera roll to find the new point. Once complete, the student could color in the picture as well if desired.

6. Students use the "export" function in their note-taking app to submit their work back to the teacher, via Schoology, email, or whatever other tool you use to collect work. No paper needed!


I'd love comments back, as to how this procedure works out for you. 

ANYhoo, I was originally planning on blogging about using Reflector app's multiple display mode in the classroom and/or at home, to see what your students are up to on their devices, and to allow them to show their work to the class as they complete it. Watch the video below for an example:


How this all started: I purchased a MacBook Mini Display to HDMI adapter at BestBuy about a month ago so my husband and I could watch movies from my Amazon Instant Video account on our giant 60 inch HDTV. I have since heard that ChromeCast works just as well. I finally hooked it up for my boys on the upstairs TV so they could watch Frozen, while my husband and I watched our own Will Farrell movie downstairs (I won't say which one, but given the blog posting date, you can probably figure it out ;)

This morning I had an epiphany: Why don't I use this same setup and turn on Reflector App on my iPad, so the kids could show their apps & games on the big screen as well? My kindergartener is absolutely LOVING the Minecraft Pocket Edition iPad app, but I only allow him to use the "creative" mode. It's like Lego's on steroids... he can build blocks, dirt, rivers, bridges, "lay animal eggs" to create chickens/sheep/cows/pigs, as well as dig holes and fly around in the sky. The animals make noises, move around, eat, and can even swim. It's a hoot! You never know what they're going to do. They can also get hurt, fall, or stuck in holes, so we've had lots of good discussions about "taking care of his virtual pets". 

It's hard to see the game just looking over the player's shoulder though, which is why the Reflector piece is nice. It also makes the game more interactive, blowing it up to 500% on our TV or on a classroom Smartboard. For a kindergartener with limited motor skills, he has made several amazing cities with their own themes (bridge city, animal city, car city, just to name a few). While this app is $6.99, it's totally worth it, compared to the small fortune most parents spend on Lego kits. If you really want to see the potential of Minecraft, check out these amazing virtual creations.

Alas, I digress. Back to the point... So I have my MacBook hooked up via HDMI adapter to our TV, I also have the WIFI connected on all our devices via the same home network. I then open the Reflector program on my computer (which you can try out and/or pay for the full Mac or PC version at www.airsquirrels.com) and set it to "no password". 


The next step is to turn on Airplay on each device you wish to reflect. This could just be your teacher/parent machine, or student iPads or Smartphones. They do need to be logged onto the same WIFI network in order for this to work. You should see their display pop up on your computer monitor once they toggle the "mirroring" button from OFF to ON. The device sound should also begin playing, so you may want to ask them to silence the app.


You can get this going on several student devices at once; however, the more devices that are mirroring, the smaller their screens will get, and the more likely your WIFI connection will make Reflector glitch out or lose the sound feed. Once you do have all the devices reflecting on your screen, you can move them around, resize and reposition them, and then continue working on the other sections of your computer. 

Whether you choose to use this tool as a monitoring function (in class or as a parent) to keep an eye on students as they work, or as a display function to model and discuss what a student is working on, it is a fantastic way to get to those "modification" and "redefinition" tasks on the SAMR model. You are creating a collaborative, interactive work space in which not only the teacher can display a website or Smart file on one side of the screen, but students can input their own work products to enrich the classroom learning experience. 

Now, if you're REALLY tech savvy, maybe you have ScreenCast-O-Matic running on your computer at the same time; so not only are you making a collaborative lesson, you could be recording the whole presentation to post later on your online classroom learning space. The possibilities really are endless. 

One last thing... when you're done, MAKE SURE you have students not only TURN OFF their AirPlay, they also need to CLICK THEIR DEVICE next to the sound bell, to stop projecting audio to your computer. Or, easier yet, simply shut down the reflector program on your computer which will detach all devices.

Thanks for reading! Good luck with your collaborations! I'd love to hear all about them so I can share with teachers in my district.