Sunday, May 31, 2015

App Smash Volume 6: Instagram, Chirp, Google Tone and Remind!


Happy June! Or, at least, it will be in 1.5 hours :) 

I wanted to share a few of my favorite pics from visiting the Lake Harriet Rose Gardens and the nearby birding sanctuary last week. This is one of the many stops on our "Expanding the Classroom Walls" onsite grad class through Learners Edge this summer. 

It's not too late to sign up! Walls I is June 15-19, Walls III is June 22-26. Only $450 for 3 grad credits!

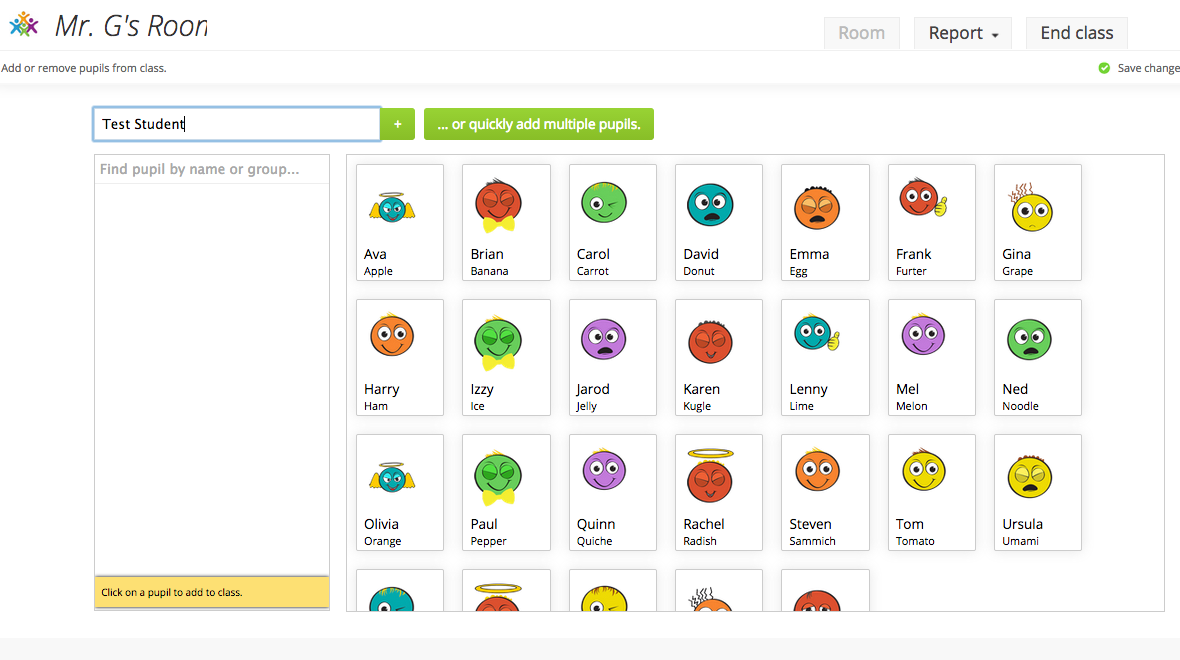
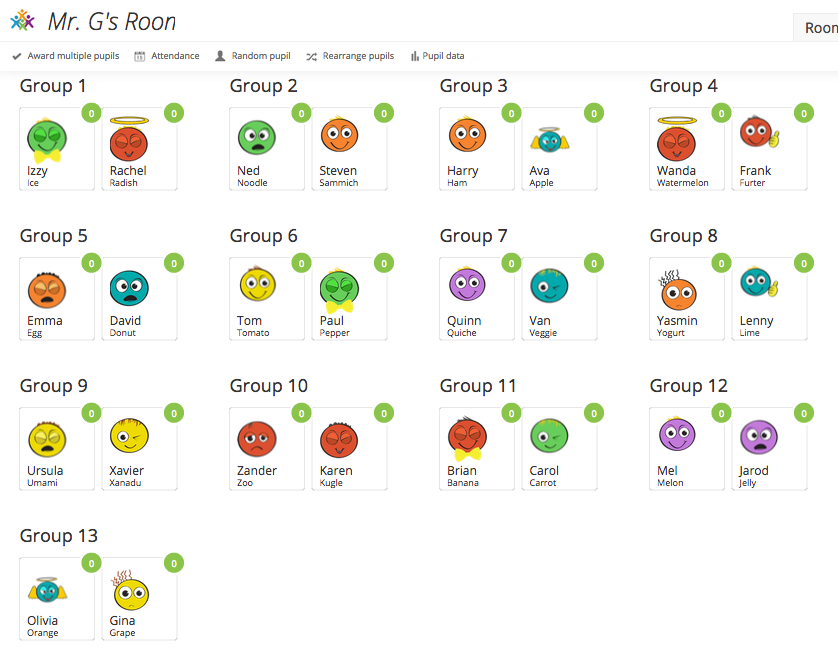
Many teachers haven't been exposed to the positive powers that are Instagram and Twitter. One of my goals with this summer class is to give teachers the time and tools to try out Social Media for themselves, through Remind.com. It's free, easy to set up, and allows teachers to send one-way texts and/or emails to students and parents that can include pictures, links and files. I used Instagram to take these pics, which can be easily sent out to members with a quick quiz.


Additionally, Instagram allows you to link to Facebook and Twitter. Upload and share your pictures and short videos with one-click! This is a new and growing trend in education, to "claim" hashtags (group thoughts) and use them to share media and comments with your students about content. For example, I'm using the hashtags "TCWallsI" and "TCWallsIII" to share content with the world. I challenge all you teachers to start tweeting educationally as well! #edtechchat


As you can see, I took many neat pictures at the Lake Harriet Rose Gardens and the Thomas Sadler Roberts Birding Sanctuary. If you are at a site with a bunch of students and want to quickly share web information, you can create a Remind post and attach the link to it. Students will receive a text or email, depending on how they registered for your class. If you don't want the hassle of setting up a Remind account, though, there are some other programs you can use to share websites, including Chirp and Google Tone.


Chirp for iPhone is free and does actually work for iPad as well. Both the teacher and all students/parents would need to have the app installed on their iPhone/iPad in order to share websites using Chirp. All you do is copy the web address into the program, click the Chirp button, and any device with the app open, in range, will "receive" the website chirp and be able to open it. (You do need cell data or WIFI in order to send/receive)

Think of the possibilities for teachers out field-tripping with their classes, who find something interesting on-the-go and want to share it! Also, if you are at school, and happen to have Google devices such as Chromebooks, there is a similar program called Google Tone that is a free extension in the Chrome Webstore. You go to the website you want to share, click the Google Tone extension, and it sends to every device in range who also has the Google Tone program open. 

**The only down-side I would warn against, is that students often figure out that there is no "off" switch, and then they begin to start "chirping" or sending out their own tones, and all other users will automatically receive whatever they are sending. Whether this is a silly selfie, or an unwanted website or pic. So make sure to be VERY clear with students, that any inappropriate or unsolicited use will result in deletion of the program from their device and a loss of participation points. 

Have fun! Be "human" this summer! Learn some new social programs! And if you haven't signed up for Twitter and started following the educational conversations there, WHAT ARE YOU WAITING FOR!?!?  


Sunday, April 12, 2015

Zombie App Mashup: Volume 5 - Classcharts.com + Google Apps = Critical Writing Awesomeness

Just over 60 days until my Learners Edge "Expanding the Classroom Walls" courses launch! Can't Wait to meet all the teacher attendees! If you're looking for a sneak peek, one of our "stops", the Carpenter Nature Center in Hastings MN, is hosting an Earth Day Birding Festival on Saturday 4/18. 


Now onto the main event! I stumbled upon a really interesting tweet a few months back about a Chrome extension (and website) called Classcharts. It took a whopping 5 minutes to set up, and I could immediately see the potential for marrying seating charts, attendance, random question asking, random group making, behavior tracking, and parent communication. Seriously... this program does it all. 

Check out their informational video:


I got to thinking, with the power of the ClassCharts group-making tool, you could do some pretty amazing think-pair-shares using Google Docs or Presentations. If your students don't have any devices, don't fret! You could totally go low-tech on this and use chart paper instead. Here's how I would do it with Google products.

1. Set up classes on the computer, at classcharts.com. Have your class list(s) handy so you can type in their first/last names quickly. If you want subs to see students instead of avatars, you can import their pictures via drag & drop or file upload. Save changes when done.


2. Click the "Room" option from the main class menu and select "Edit current room". 

Drag and drop the desks the way you want them. You can turn them using the spinning arrow next to the trash icon.


See how pretty it looks, compared to most grading programs that only allow rows/columns!? 

The room is even set up correctly, with the front of the room at the bottom, like the teacher is looking out at the students.

3. Click the green "Return to class" button and then the fun really begins. Use the "Rearrange pupils" to automatically fill in your seating chart. I love that you can select to place Boys & Girls together, group Behavior scores together or apart, and can click the "Fill from front" button. Then, click "Optimise seating chart" and watch the magic happen. 


I used to spend HOURS making good seating charts and arranging the students' names into a Smart Notebook slide; now, if I don't like the one the computer makes, I just click "rearrange" repeatedly until I find one that works! The best part is, the more you use the behavior tracking part of the program, the better the AI computer will "optimize" your seating charts.


4. THINK: Give your students a question prompt, and allow them 5-10 minutes to jot down or type their answers into their device ON THEIR OWN. 

5. PAIR: Click the "Rearrange pupils" button and select the green "Make groups" button at the bottom. Drag the indicator line over until you have the right quantity for "Make X number of groups that have 2-3 students". Click "Make Groups". Here's what my "13 groups of 2 students" looks like.

Have the students move next to their partner that you have randomly selected using the group maker. The student on the left of each group (in the picture) will start up a Google Doc and share it with their partner and the teacher. 

Students copy/paste their existing writing into the shared document. Then discuss, evaluate, revise, and add to the document so that the "best of the best" ideas are represented. 

**Circulate while the students work; award positive & negative behavior points in the Classcharts program as needed. (As below)


6. SHARE: Use the group maker again, this time making groups of 4-5 students. Have students move to sit with their new group. 


You as the teacher create a Google Presentation and add add a slide for each group. Share the presentation with the entire class. (Group email distribution list works great for that, or Google Classroom, or Doctopus) 

7. GROUP THINK ACTIVITY: Each group completes the discuss/evaluate/revise/add activity again, referring back to the shared Google Documents that their partner groups had previously made. Their task is to come up with a unique "group thought" that synthesizes their ideas into one, coherent product. They delegate an editor to create their group's unique vision on their Google slide.


I attended a Google Leadership Symposium on March 24th where they had us do a similar activity. We started on our own (on paper), then processed with a peer (on paper), then talked as a group to make a slide. **One thing we noticed, that teachers should keep in mind, is that individuals kept changing the "theme" and even the order of the slides, which affected everyone who was working on it. 

Make sure to clarify who's slide is whose, and that they should only be making changes on THEIR OWN slide. If you, as the teacher, want to make a title slide, I would do it *after* the fact. That way Slide 1 belongs to Group 1, and Slide 2 to Group 2, and so on and so forth. 


8. PRESENT: Use the random student picker tool do select who will speak about the slide from each group. If they are unable or unprepared to speak, you can assign behavior points as needed. If they do a great job, you can award them merit points. 

Watch the random student picker tool in action:


And that's all she wrote! Critical writing is all about evaluating the merit of information, and the ability to defend your thinking effectively to an audience. 

Classcharts.com and Google Apps for Education are two easy-to-use tools to help you incorporate this important 21st Century skill into your teaching!

Try them out. I'd love to hear how it goes!

Cheers,
-Mandy


Thursday, March 12, 2015

"Expanding the Classroom Walls" registration opens Tuesday 3/17!


Happy Spring Break everyone! We're going to hit 63 degrees today in Minnesota. Time to put on shorts and get the deck furniture out :) 

While I may be on break from my "day job", I'm also hard at work on my summer job; coordinating a pair of 3-credit summer onsite courses for Learner's Edge entitled "Expanding the Classroom Walls". Each course is an action-packed week of hands-on learning experiences at 15+ unique Twin Cities venues.

If you've never taken a course from Learner's Edge before, you are truly missing out! For only $450 per course, you receive 3 semester credits to apply toward district lane changes. Or sign up for both courses! OS-651 runs 6/15-6/19. OS-890 runs 6/22-6/26. 

The first ten teachers to sign up and tweet me @MandyBellm with hashtags #TCWallsI and/or #TCWallsIII will receive a prize on the first day of class!

What are the courses all about? 

Think back to your childhood. What are your most cherished and vivid memories from your school days? Many are probably from FIELD TRIPS! With tight budgets and constant pressure to meet state and federal standards, students are being exposed to fewer hands-on arts and enrichment experiences outside the classroom than ever before. Sadly, these very same field trips provide much more intense memory development and curriculum retention than ordinary classroom lectures. 

Fortunately, this trend does not need to continue! There are many low-cost options right in your own back yard. You may not even have to physically go to the sites; many locations will now bring their exhibits to you, either as traveling shows or as a virtual field trip. This course aims to open your eyes to new curricular opportunities, allowing teachers to examine their content for real-world learning applications, and to return with a field trip action plan that can be implemented immediately.

Tech-savvy teachers (and those brave enough to learn!) will get to try out QR codes, Google Forms, learn about geocaching, and research virtual field trips related to your content area. You can tweet and/or follow along on Twitter and Remind.com

Questions? 
Email me: mandy_bellm@yahoo.com 
Email Learner's Edge: info@LearnersEdgeInc.com 

Here is some more detailed information, for my visual learner friends :)

OL-651 Itinerary (current as of today, 3/12): 

Monday 6/15: (9-4)
Meet & Greet @ Terrace Cafe, SPSC
Gabbert Raptor Center
Lunch break in Dinkytown
Bell Museum of Natural History
Como Zoo Tour & Wildlife Demonstration


Tuesday 6/16: (9-4)
Historic Murphy's Landing
Minnesota Landscape Arboretum
Lunch break at Oswald Visitor Center Restaurant
Wood Lake Nature Center


Wednesday 6/17: (9-4)
Basecamp BSA Rock Climbing & Ropes Course
MN Air National Guard Museum 
Lunch break & Geocaching @ Fort Snelling State Park
Historic Fort Snelling


Thursday 6/18: (9-4)
Ride the Light Rail Green Line! (optional)
Minneapolis Riverfront Walking Tour
Mill City Museum
Lunch break @ D'Amico & Sons
St. Paul Landmark Center tour & Exhibits


Friday 6/19: (9-1)
Dakota County Jail
St. Croix Valley Nature Center
Waste-Free Bag Lunch & Farewell @ Nature Center


OS-890 Itinerary (current as of today, 3/12): 


Monday 6/22: (9-4)
Meet & Greet @ Caribou Coffee in Ridgedale Mall
Westwood Hills Nature Center
Lunch & Scavenger Hunt @ Midtown Global Market
In the Heart of the Beast - Puppet & Mask Theater


Tuesday 6/23: (9-4)
Children's Theater Co. & MIA Tour
Lunch @ Eat Street Restaurants
Minnehaha Lock & Dam #1 Tour
Stevens House & Gardens Tour
Minnehaha Falls & Geocaching


Wednesday 6/24: (9-4)
Lyndale Park Rose Gardens
Thomas Sadler Roberts Birding Sanctuary
Pavek Museum of Broadcasting
Lunch & Tour @ St. Louis Park Rec Center & Wolf Park
MN Transportation Museum & Street Car Ride
Lake Harriet Bandstand & Geocaching


Thursday 6/25: (9-4)
Bruce Vento Nature Sanctuary @ Phalen Creek
Minnesota History Center
Lunch @ Cosetta's
James J. Hill House Tour & Art Exhibit
Summit Ave Walking Tour ending at St. Paul Cathedral


Friday 6/26: (9-1)
WHCPA Pioneer Museum Tour with Bob Gasch
Long Lake tour of "The Big Woods" 
Gale Woods Farm Tour
Lunch & Farewell @ Peg's Countryside Cafe


Frequently Asked Questions:

Are entrance fees included in the course registration?
Yes, all facility fees are paid.

How is transportation arranged?
Teachers can drive one their own, or arrange car pools and split gas/parking fees if desired. I am coming from the west metro and can transport ~4 people each day.

Is lunch included?
No, all lunch activities are optional. Feel free to bring bagged lunches, water and snacks to eat whenever desired. 

What do we do if it rains?
Alternate rain-out activities such as virtual field trips will be provided as needed. 

What should we wear?
We will be walking around a LOT. Bring your teacher badge, dress appropriately in layers and wear comfortable close-toed shoes. Bring sunscreen, smart phones, chargers, notebook/paper, etc. as needed. 


Do I need to be a practicing teacher to take this course?
Some of the sites would prefer attendees to bring a teacher badge, but it is by no means required. Any teachers, subs, paraprofessionals, social workers, or other education professionals who are seeking graduate work or relicensure credits are welcome to enroll.

Do I need to be "techie" to take this course?
No, but teachers with smart phones will be learning how to use the QR Reader app and Remind.com. Teachers will be filling out Google Form surveys for each site we visit. Teachers are also encouraged to post pictures, info and videos to each site's Twitter and/or Facebook page as desired. 

What if I have other questions?
Email me at mandy_bellm@yahoo.com 

I look forward to seeing you there! Space is limited, so sign up right away on 3/17!
-Mandy

Monday, February 16, 2015

Zombie App Mashup Volume 4: Seesaw & Number Pieces Basic App + Coordinate Graph Art: Elementary Edition

Happy Presidents Day everyone! 

In honor of the holiday weekend, Amazon.com has my new book on sale for $11.50 AND it qualifies for Prime free 2-day shipping! This elementary edition will greatly simplify your life, in that each puzzle and its graph paper are contained on a single page... making them easy to import into a mobile device for coloring with Notability, Skitch, or some other coloring app. 

The target audience is grades 3-6, but this workbook is great for your younger high flyers... and extra fun for older students too!

Each of the individual chapters are for sale in my TpT store as well, if you want to try one out before buying the whole book.

And now for the long-awaited 4th edition of Zombie App Mashup... my two new favorite apps! Seesaw: The Learning Journal and Number Pieces Basic (which is anything BUT!). I can't take credit myself for either of them. One of my third grade teacher friends suggested the Seesaw app for his 3rd grade students, to be able to create, upload and submit work samples to the teacher without having to log into any accounts. And my first grade teacher friends tasked me with finding a place value app... then graciously allowed me to come into their classrooms and try it with their students! It was a big success!

The only thing I can possibly take credit for... is mashing these two together. I'll show you the benefits of both, and then how they can work together with just a few iPads in a classroom, or even using your teacher iPad / mobile device on its own. 


Let's start with the Seesaw app. Don't be confused... it doesn't say "Seesaw" on the app logo. But it has a picture of a seesaw! It takes maybe 5 minutes to download the app, create your class, and type in your students' names. Then you save and print a QR code that you can post in a digital lesson or on your actual classroom walls. Students scan your code, pick or create their item, upload it, and tag themselves (and any classmates who worked on the project). It's that simple!


Students can take a picture, write on it, or take a video, create a drawing, or pull an item off the camera roll. You as the teacher get an alert to "moderate" the item, to make sure it is tagged correctly, and that the work sample is high quality enough to be saved. Once you "accept", the item goes into that student's folder and then parents can be notified via email or push notification that a new item has been submitted. Easy enough for kindergarten; sophisticated enough for much older students to benefit as well! Here is a demo work sample:


Now let's change gears over to the Number Pieces Basic app... so you can see how that ties in... imagine you are teaching in a 1:1 environment, or as is the case for my district, a cart model. Students can easily log in and out of the Seesaw app on the cart, but they can also have the power to share work they have done in various apps. 

The key is teaching them how to use the "screen capture" feature, which many of them know how to do anyway. 

Hold down the home button and sleep button at the same time. 

You will hear the camera click; the picture is now saved to the iPad's camera roll. 

If you have taught your students how to use Seesaw and take  screen shots, the sky is really the limit. You could have them screen shot a "ShowMe" presentation with a picture and a sentence... or take a short video of themselves reading... or take a picture of a paper copy of work... or... submit a math problem using Number Pieces Basic!

I initially started using this app with 1st graders, to model place value with 100's, 10's and 1's, and to practice writing math sentences using addition and subtraction.

Then, of course, as often happens... the students discovered they could change the color of the pieces!

Perfect! Now we can use the same app to model integer equations.

Students drag the pieces over to the work area and then change the color from yellow to red, to represent negative numbers.

You can use the ten sticks to model variables, and the hundreds sticks to model exponential equations.

You can practice this as a station or as a 1:1 iPad activity, or as a whole-group activity on your teacher iPad.

Then, challenge your students to complete a final work sample... screen shot it... and submit it to the Seesaw app for credit.

You could even have them working with actual manipulatives or on a real mini-white board, and use your teacher device to video record themselves talking about their problem. Either way, they tag their name and submit it. The work process is the same.

Imagine the power... at conferences... your parents come in to hear how their child is doing in your class, and you have all sorts of work samples to show them. Video, picture, app screen shots, in addition to test scores and other paper items. What a great way to show growth over the course of the year!

Got more ideas for apps to combine with seesaw? Send 'em my way!


Monday, December 1, 2014

Zombie App Mashup Volume 3: Doceri/Google Screencasting + Coordinate Graph Art Section 2: Graphing Pets! is now available


http://www.teacherspayteachers.com/Product/Elementary-Coordinate-Graph-Art-Section-2-Graphing-Pets-1590910
Happy Holidays everyone! 

It's December 1st and we've already got the tree up, the lights hung, decorations are on display, and somehow I've finished Section 2 of Coordinate Graph Art: Elementary Edition! It continues to cover the basics of coordinate plane graphing, using a fun pet theme. Eight cool new graphs are included, like this simple but funky kitten :)

I am also starting a new adventure in the new year (in addition to my current job, which I still LOVE!), working part time in the evenings and summers for Learners Edge, Inc. evaluating and coordinating two online and one on-site course over the next six months.  This puts some added pressure to finish up this current Elementary book, but that's what Zombies do best... stay up all night, eat some chocolate Santas, and get 'r dun. 

While I work on that, I've got a new App Mashup for you to chew on:

Doceri Desktop iPad App + Whatever you're doing on your computer + Google Drive

https://itunes.apple.com/us/app/doceri-interactive-whiteboard/id412443803?mt=8 I find it quite funny that one of our oldest and most reliable apps has taken a complete back seat to more "exciting" presentation apps, like Educreations, ShowMe and Prezi, just to name a few. Not that there is anything wrong with those; I still like them very much! But when you're in a pinch, and you need to make a quick demo video of something you're doing on your computer, Doceri Desktop gives you a nice hands-free way to do it, complete with an ink layer!

Many teachers have discovered that you can download the free computer version of Doceri from their website, as well as the iPad app, and use the program over Airplay to remote-control your Powerpoints, Smart lessons, PDF's, websites, whatever it is you are displaying. BUT the vast majority of those teachers have forgotten that there is a record button sitting up there in the top/left corner. You can see it from here, can't you?!? 

If you're going to be out sick the next day, simply pop up your lesson, in whatever format you've got, turn on Doceri, hit record, and start talking/surfing. There's even a "pause" button if you need to stop and cough. Or worse. SERIOUSLY people, there are some nasty, nasty bugs going around right now. Take it easy! Take a day off... do some Christmas shopping, at the very least. 

Anyhoo, when you feel like continuing, hit the record button again and keep going with your lesson. Don't forget about the ink layer button! This tool makes Doceri sooooo much better than Splashtop, not to mention the never-ending free trial ;)  You can hit the start/stop button on the pen as well, while you're still recording, and move back to remote controlling your computer. I usually try to keep my recording to under 5 minutes, so as not to "lose" the audience. 2-3 minutes is probably more realistic. You can always do multiple recordings as well. 

When you're done, go to the folder icon in the top-left corner. Select the presentation you just made, and save it to your camera roll. 

From there, open your Google Drive app and use the upload button to grab the video from your iPad. I shared directions and screen shots for how to do this on my last blog post. You can then share your video anywhere! Your LMS, an email, a "Remind" message, a Tweet, on Google Classroom, you name it. Instant flipped lesson. Or email it to your sub to use while you STAY HOME AND REST!!

**Just don't forget to adjust the "sharing" settings to say "anyone with the link can view". Otherwise you're going to get a big room full of crickets and a video that won't play. 

This may not be the most exciting app mash-up I've shared, but it's definitely one of the more under-utilized ones. You don't have to be Mozart or Shakespeare to make screencasts. Just start simple! Record while you're teaching. The kids don't even have to know that you're recording. 

You could even try it with my new TpT item, Graphing Pets! Put the instructional page up on the Smartboard and turn on Doceri. Hit record... read through it with the students, turn on the ink layer, and either you as the teacher, or one of the students, can write down the answers and complete the graphs. Then try out the process I've shared, and post it as a flip-lesson, with choices of the other 7 graph pets for homework! 

Simple, easy, fun... with the lesson objective and student engagement at the heart of the activity :)  

Now it's waaaaaay past Zombie's bed time... Nighty night!


Sunday, November 16, 2014

App Mashup Volume 2: Pic Collage + iMovie + Google Drive and Coordinate Graph Art: Elementary Edition Update!

http://www.teacherspayteachers.com/Product/Elementary-Graph-Art-Section-1-Graphing-ABCs-1562019
From "Happy Spring" to "Happy Fall", all in one blog post. OUCH. 

I'd say I'm sorry, but... I'm not. 

Honestly life is moving at such a break-neck pace right now that it's a gift just to take a deep breath a few times a day, get some exercise a few times a week, and if I'm REALLY lucky, sneak in a nap here and there.

When I think of how far I've come (and the rest of the world as well) since my first blog post in 2011, I'd say the old Zombie would hardly recognize the new Zombie. I'm guessing you readers feel the same? Can I get an "Amen!"?


For starters, I value my sleep a little more than I used to. Having moved within 2 minutes of all the schools I visit on a daily basis, knowing that I *could* and SHOULD be getting 7-8 hours of sleep, I sometimes actually do sleep 7 hours. So I'm more a figurative Zombie these days than a literal one.

On top of that, I now publish daily help documents, post district technology updates to our LMS, craft style guides, etc. for my job... so coming home and writing additional works... whether they be blogs, workbooks, tweets, or otherwise... is kind of overkill. But, I happened to have a quiet weekend for once, and a clean house (which rarely happens these days!), and I have news to share that is getting me to finally, FINALLY, compose another blog post... drum roll... 

Coordinate Graph Art: Elementary Edition is now in the works! The idea for this book has been stuck in my head for years... ever since I wrote my first edition... but it seemed more appropriate to write Advanced Graph Art first so that those high-flyer students could keep working, than to back-track and start writing for a younger audience. 

I knew I wanted to open with an ABC section of Graph Art, so children could not only practice beginning graphing skills, but could also make a set of their name letters that could be connected into a banner for home or school use. Hence the example on the back cover, which is yet another tribute to my late sister Ashley in the coolest way I could think of :)  LOVE YA SIS!

Enough shameless plugs for my various products... I did have a point to this post... I suppose I should get to it!

Alrighty then - App Mashup Volume 2... I'm currently working with our Elementary Spanish teachers to incorporate our 1:1 fourth grade iPad project into their classes. When you only have 20 minutes per day with each class, it's hardly worth the trouble to get out the iPads, try to train the kids on an app or get to a website, and then have any time left over to learn new content. My solution? Start with an app the kids are already familiar with. Pic Collage. It's free, doesn't require any accounts to be made, and is extremely easy to use. 

Here's an example of a completed Pic Collage. It's like a virtual scrap book page. You choose a background, then overlay stickers, photos from your camera roll, images from the internet, text, and then easily turn/twist/size/layer them to your heart's content.

There is zero limit to a child's creativity... give them a topic and let them go nuts. I'd put this app in the "M = modification" level of SAMR, because there is so much added functionality and student input required in synthesizing together the various pieces of content that they chose in a meaningful way. 

When finished, simply export to your camera roll and email/upload/post it anywhere.

The mashup comes in when you take various Pic Collage images and send or post them to a common location. In this case, I want to use iMovie to compile all the Pic Collages together and then dub an audio track over the entire presentation. Whether you choose to have multiple students work on their own Pic Collage, and then have one master student (or the teacher) compile the images into the iMovie, is totally up to you. 

When you are ready to begin the iMovie portion, you select "Movie" instead of trailer, and then add each of the Pic Collage images into the video in the order you would like them to display. 

The next step is to record the audio to go with each image. If students are involved, you can call them up one by one to speak about their portion (talk loud for the mic!!!). Otherwise, you as the teacher can record your own audio that covers the entire video. 

Last, adjust the length that each image displays, to match the audio clip that pertains to it. Play the whole video back to ensure it is correct, before exporting the final draft to your camera roll. Once you make this step, you will lose any editable features in the compiled video (unless you keep the pieces on your device and in iMovie - which take up a lot of space!). 

To export your video, click back to the main menu for your video. You should see the title, the duration, and the last modified date. 

Click the export box with the arrow pointing upward (circled at left). Then select "Save Video" to export the video to your device's camera roll. From there, you can send anywhere. BUT keep in mind, it's probably a very large file size... so you can't just email it around.

Which brings me to the last step of this App Mashup - sending your project somewhere for an authentic audience. If your school uses an LMS (we use Schoology), you can go into the app and upload the video into a media album, post as an update, or add to your personal/group/course resources. If you don't have an LMS, or want to avoid that step, you can upload your video to Google Drive from the Drive app (either Droid or Apple). 

Launch the app, then hit the + button and select "Upload Photos or Videos". Click on "Photos" and then pick the video(s) and other media you want to upload. Click the blue checkmark. 

Then WAIT. Your device will look like it's "frozen", (Hahaha) but it's NOT. It's just thinking. So Let it Gooooooo... maybe watch this hilarious cover while you're waiting. Best ever. Even if you're as sick of the song as I am ;)

Once it's done uploading, you're ready for the final step.  And the most annoying one... because now you need a computer... so boot up your Google Drive and click the "sharing" button on your video. You need to change it from "Private", to "Anyone with the link can view". 

You cannot do this final step from the app (yet!?!?); all you can do is add individual viewers' emails which is too tedious unless it is a student sharing with only one teacher. At any rate, once you have added the viewing audience, you can copy/paste the link to the file, and then post it or email it to any authentic audience, anywhere on the planet... or in cyberspace.

**Please keep in mind, if any students' personal information or photos are present in any of the parts of the video or Pic Collage, you will need to obtain written permission from the student and/or parents (if a minor) before posting takes place. 

That's it for now! I hesitate to give you project suggestions of how you could incorporate this mashup, because your goal with technology integration should *really* be on what your instructional / curricular objectives and learning targets are. If you have decided on those aspects of your assignment, and this work flow fits into what you or your students are doing, I'd love to hear about it!

Post a reply and let me know what worked/didn't work or whatever questions you have about the whole process. 

And don't forget to stop by my TpT store and check out my new unit! :)