

Just over 60 days until my Learners Edge "Expanding the Classroom Walls" courses launch! Can't Wait to meet all the teacher attendees! If you're looking for a sneak peek, one of our "stops", the Carpenter Nature Center in Hastings MN, is hosting an Earth Day Birding Festival on Saturday 4/18.

Now onto the main event! I stumbled upon a really interesting tweet a few months back about a Chrome extension (and website) called Classcharts. It took a whopping 5 minutes to set up, and I could immediately see the potential for marrying seating charts, attendance, random question asking, random group making, behavior tracking, and parent communication. Seriously... this program does it all.
Check out their informational video:
I got to thinking, with the power of the ClassCharts group-making tool, you could do some pretty amazing think-pair-shares using Google Docs or Presentations. If your students don't have any devices, don't fret! You could totally go low-tech on this and use chart paper instead. Here's how I would do it with Google products.
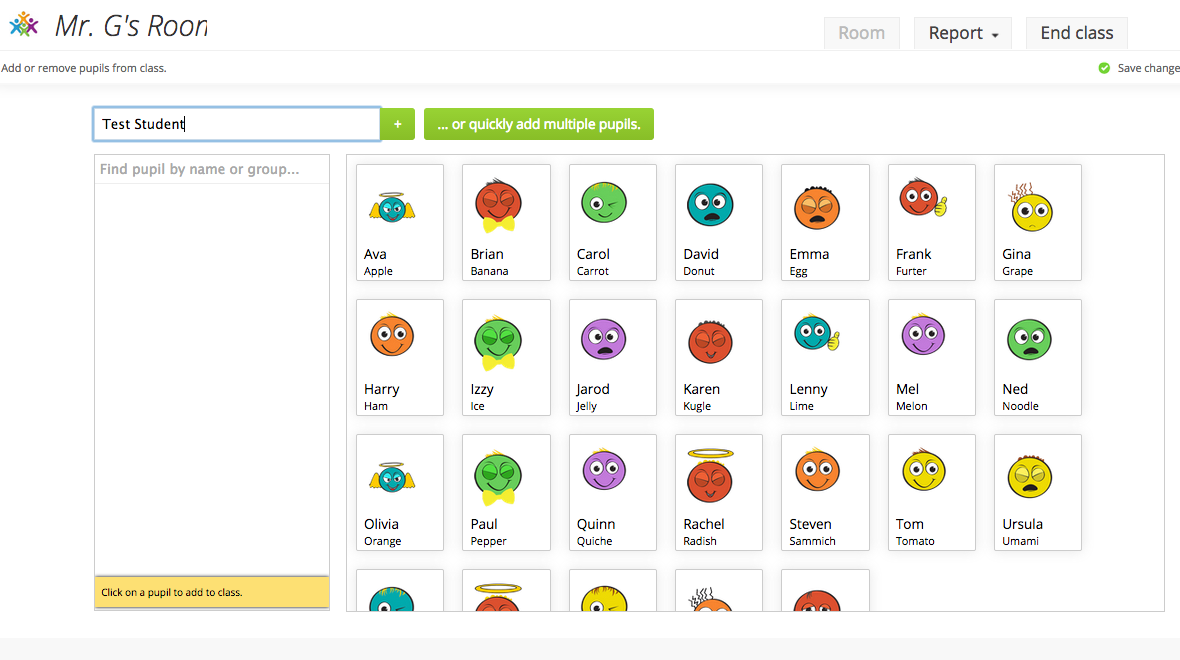 1. Set up classes on the computer, at classcharts.com. Have your class list(s) handy so you can type in their first/last names quickly. If you want subs to see students instead of avatars, you can import their pictures via drag & drop or file upload. Save changes when done.
2. Click the "Room" option from the main class menu and select "Edit current room".
Drag and drop the desks the way you want them. You can turn them using the spinning arrow next to the trash icon.

See how pretty it looks, compared to most grading programs that only allow rows/columns!?
The room is even set up correctly, with the front of the room at the bottom, like the teacher is looking out at the students.
3. Click the green "Return to class" button and then the fun really begins. Use the "Rearrange pupils" to automatically fill in your seating chart. I love that you can select to place Boys & Girls together, group Behavior scores together or apart, and can click the "Fill from front" button. Then, click "Optimise seating chart" and watch the magic happen.

I used to spend HOURS making good seating charts and arranging the students' names into a Smart Notebook slide; now, if I don't like the one the computer makes, I just click "rearrange" repeatedly until I find one that works! The best part is, the more you use the behavior tracking part of the program, the better the AI computer will "optimize" your seating charts.

4. THINK: Give your students a question prompt, and allow them 5-10 minutes to jot down or type their answers into their device ON THEIR OWN.
5. PAIR: Click the "Rearrange pupils" button and select the green "Make groups" button at the bottom. Drag the indicator line over until you have the right quantity for "Make X number of groups that have 2-3 students". Click "Make Groups". Here's what my "13 groups of 2 students" looks like.
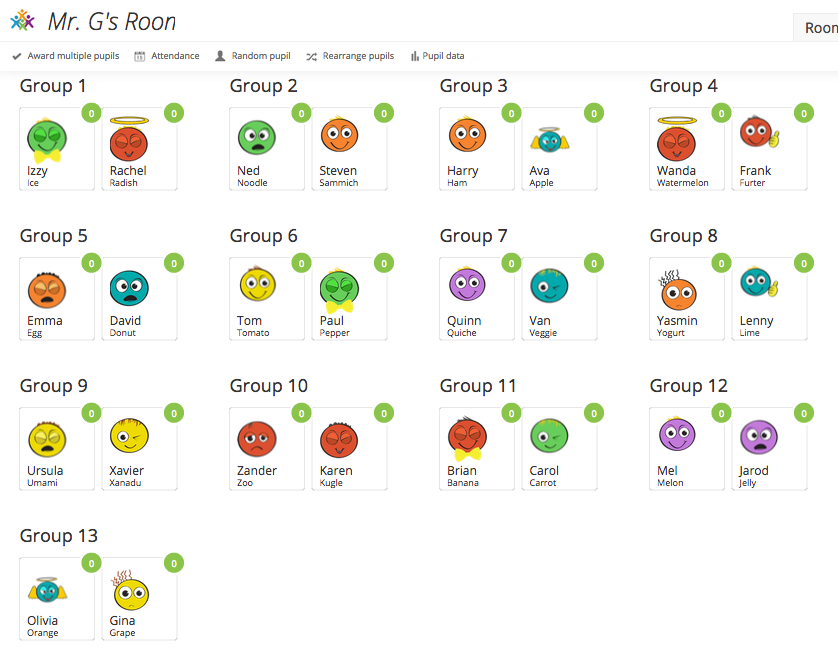 Have the students move next to their partner that you have randomly selected using the group maker. The student on the left of each group (in the picture) will start up a Google Doc and share it with their partner and the teacher.
Students copy/paste their existing writing into the shared document. Then discuss, evaluate, revise, and add to the document so that the "best of the best" ideas are represented.
**Circulate while the students work; award positive & negative behavior points in the Classcharts program as needed. (As below)

6. SHARE: Use the group maker again, this time making groups of 4-5 students. Have students move to sit with their new group.

You as the teacher create a Google Presentation and add add a slide for each group. Share the presentation with the entire class. (Group email distribution list works great for that, or Google Classroom, or Doctopus)
7. GROUP THINK ACTIVITY: Each group completes the discuss/evaluate/revise/add activity again, referring back to the shared Google Documents that their partner groups had previously made. Their task is to come up with a unique "group thought" that synthesizes their ideas into one, coherent product. They delegate an editor to create their group's unique vision on their Google slide.

I attended a Google Leadership Symposium on March 24th where they had us do a similar activity. We started on our own (on paper), then processed with a peer (on paper), then talked as a group to make a slide. **One thing we noticed, that teachers should keep in mind, is that individuals kept changing the "theme" and even the order of the slides, which affected everyone who was working on it.
Make sure to clarify who's slide is whose, and that they should only be making changes on THEIR OWN slide. If you, as the teacher, want to make a title slide, I would do it *after* the fact. That way Slide 1 belongs to Group 1, and Slide 2 to Group 2, and so on and so forth.
8. PRESENT: Use the random student picker tool do select who will speak about the slide from each group. If they are unable or unprepared to speak, you can assign behavior points as needed. If they do a great job, you can award them merit points.
Watch the random student picker tool in action:
And that's all she wrote! Critical writing is all about evaluating the merit of information, and the ability to defend your thinking effectively to an audience.
Classcharts.com and Google Apps for Education are two easy-to-use tools to help you incorporate this important 21st Century skill into your teaching!
Classcharts.com and Google Apps for Education are two easy-to-use tools to help you incorporate this important 21st Century skill into your teaching!
Try them out. I'd love to hear how it goes!
Cheers,
-Mandy
No comments:
Post a Comment